The FieldTest pixel is a small piece of code that allows a third party to track events like traffic, sales and more. Pixel implementation is an important part of a successful campaign.
By default, FieldTest offers two different pixels: The Tracking Pixel and the Purchase Pixel. Each has its own individual function and process for implementation.
What do the Tracking Pixel and Purchase Pixel do?
- Enables you to track your website traffic and conversions on FieldTest Dashboard
- Enables AI auto optimization for your ad campaigns
- Allows Audience Predictor AI to create custom Lookalike and Retargeting audiences
- Tracks sales events, firing a "conversion" and passing back the order ID# and revenue from purchases made as a result of your ad campaigns.
Here's how to implement each of these pixels on your website:
The Tracking Pixel
The Tracking Pixel is a lightweight piece of code that monitors site activity and traffic driven by your ads. Implementing this pixel is among the most important keys to success with FieldTest. Without it, you'll have no visibility into your campaign performance on the FieldTest Dashboard.
To implement the Tracking Pixel, simply navigate to your Pixels page and copy the code from your Tracking Pixel form.
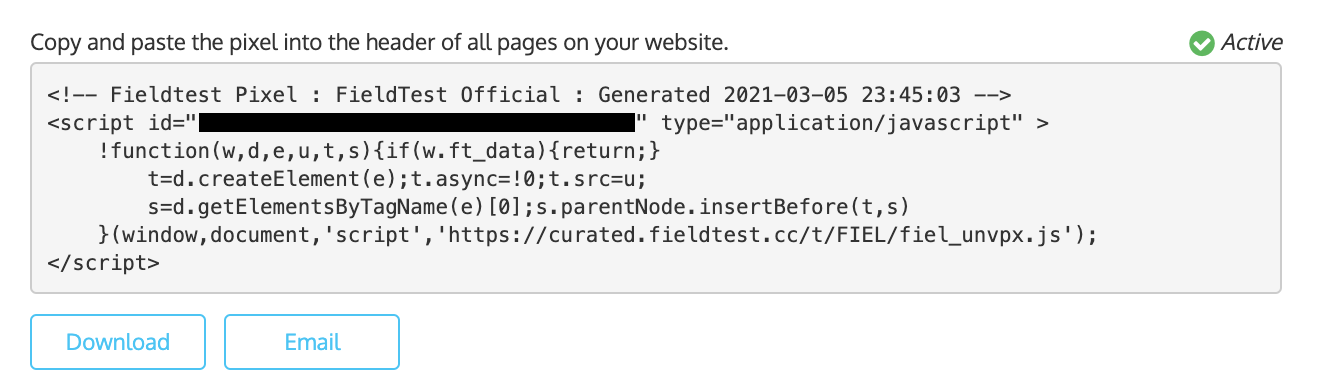
From here, paste it into the header (above the <head> tag) on every page of your website. Typically this is done by editing your header template or your theme document.
For example, for Shopify users, this is "theme.liquid". For Squarespace users, this is done by navigating to Website Tools> Code Injection and pasting the code in the "Header" section.
Protip: You can click or tap the "Download" button to download a simple text document with the tag, or the "Email" button to email the tag to your site admin or developer.
Once the pixel is placed, a graph will appear on your pixel window displaying daily hits to your website. Clicking the "Show Pixel" button underneath this graph will display your live pixel code if needed.
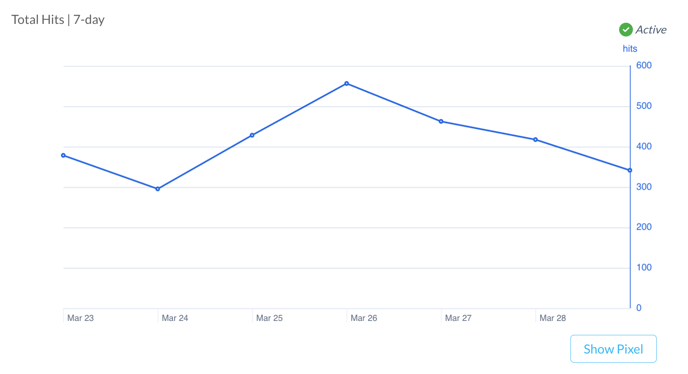
Note that it may take up to a dozen website visits to activate your pixel. You can help move this along by loading your website a few times.
Once your pixel is implemented and active, it's time to set up your Purchase Pixel.
The Purchase Pixel
The Purchase Pixel is a second lightweight string of code, this time tracking sales, firing "conversions" in your FieldTest reporting, and allowing you to view order ID numbers and revenue from each sale driven by your ad campaigns. It's super important, and we've tried to make it super easy to install, by allowing you to select your e-commerce platform and pre-generate a pixel with the pass-back macros set.
Wait, what are "pass-back" macros?
Every e-commerce platform has a custom line of code called a macro, that allow a signal to be sent to FieldTest to show in your reports. We have two macros: Purchase Value and Order ID. This allows you to see your sales and order from FieldTest campaigns. Macros change depending on which platform you select, so make sure you select the correct platform, or choose "Custom" if you don't see your platform listed, or operate on a custom website and want to edit your own macros.
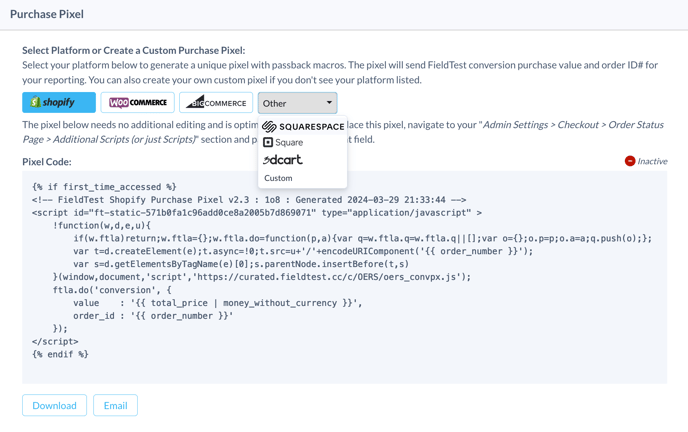
Once you've selected your platform, you'll see instructions above the Pixel Code change depending on the platform selected. Copy and paste the code accordingly, on the checkout confirmation page (the "thank you", receipt page) that appears to a user after a successful sale. Typically this code can be placed in a "Checkout" or "Conversion Tracking" section of your platform, but each setup is different and in some cases unique.
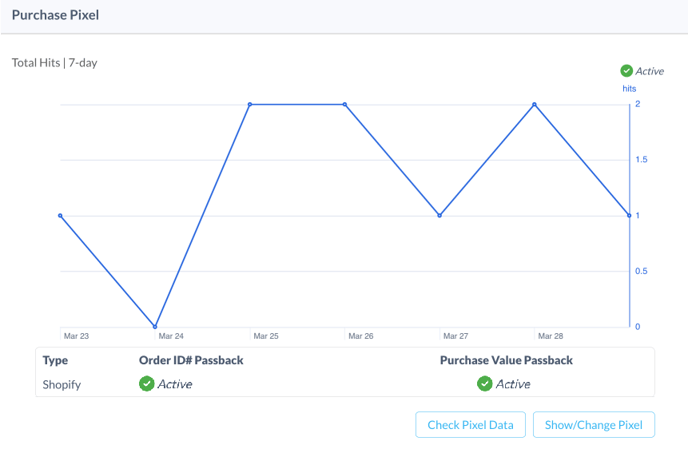
Once your Purchase Pixel has been placed, either do a test purchase on your website, or wait for an organic sale to occur, at which point you'll be looking for three "Active" green lights to appear. One for the general pixel placement, located at the top right of the "Total" Hits indicator, and two for your macros, one for each "pass-back": Order ID, and Purchase Value:
When the pixel is placed, you may see the Hits counter become "Active", but have to troubleshoot the macros until they turn green and activate as well.
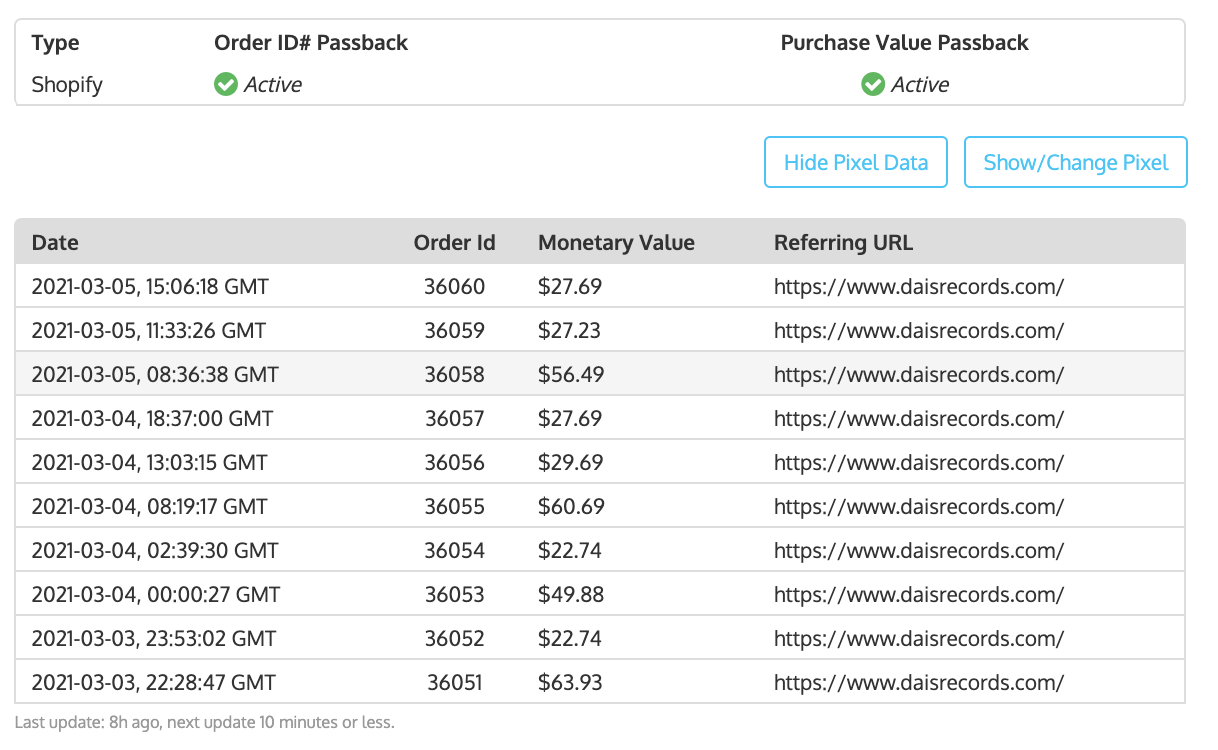
To check passback, click "Check Pixel Data", which will show what the macros are passing back. If you see revenue and order IDs, you're in good shape! If you see blank pass-backs, code snippets or "null", it means something is wrong and you need to address your code placement or update your macros appropriately. Below is an example of a working Purchase Pixel, fully "validated":
Did that make sense? Pixel setup can be tricky, so if you have any questions give us a shout at support@fieldtest.la.